

Missed the beginning of the series? Read them here: Starting your own Herb Garden: Part 1: The Benefits of Fresh Herbs, here: Starting your own Herb Garden Part 2: Planning and Layout, and here: Starting your own Herb Garden Part 3: Seed Starting and Growing from Cuttings
This week TAiMH will show you how to make a variety of beautiful recycled herb planters and get some ideas for creating your own unique indoor herb garden. It's time to get creative.
But first, an update on the seeds we planted last week in our totally recycled starter pots:
Yes, I confess these are watermelon seeds, not herbs. My herbs are already potted or planted. But you get the idea. It works.
 8 out of 14 watermelon seeds (from farmer's market watermelon) germinated!
Also, I happened to buy a little ceramic elephant oil burner that came in this little clear plastic box. So instead of throwing away the packaging, I've recycled it into the perfect mini-greenhouse.
 I planted habanero pepper seeds in these. They're notoriously hard to germinate. Cross your fingers for me.
 Recycled mini-greenhouse
Now that your little seeds have germinated, the next step is to pot them. Here are some ideas for creative recycled planters
Hack #1: Turn vegetable cans/tins into a matching set of planters for your indoor herb garden.
Materials
- vegetable cans/tins (remember to poke holes in the bottom for drainage)
- ribbon, buttons, bottle caps, bows, or any other little decorative, waterproof things you've got lying around
- a hot glue gun (or at least some super glue)
- Scotch tape
- Sharpies
Possibilities:
 I've been dying to do one covered in multicolored buttons, but I haven't collected enough yet.
Need more inspiration? How about these great recycled planters:
 culantro (related to cilantro) in a broken concrete block
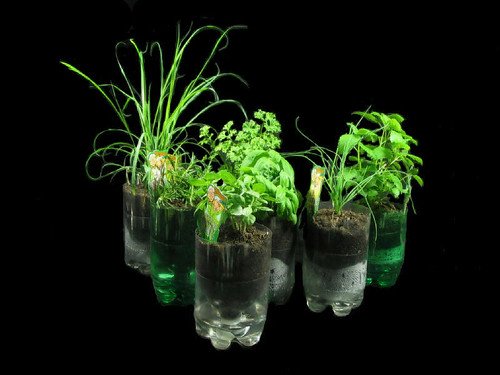 2 liter bottle herb garden from GreenScaper
 Coffee can hanging planter, tutorial on Beach Petals
 recycled windowsill herb garden, from Apartment Therapy
If you haven't got any suitable materials to recycle into planters, why not buy some cheap ceramic pots and paint/decorate them yourself? Fresh paint is also a great way to recycle an ugly old pot into a pretty one that matches your kitchen. ;)
 Plain ceramic pot $1, painted with acrylics
Ready to transplant?
Transplanting Seedlings
When your herb seedlings are about 3-4 inches tall, they're ready to transplant into your new lovely planters. Fill your new planter to about an inch from the top with potting soil and make an indent in the center in which to place your seedling. Peel off the masking tape from around the starter pot, carefully remove the paper bottom, and place your seedling, paper towel roll and all into your new planter. Water lightly.
Transplanting cuttings
When your cutting has roots at least 4 inches long, you're ready to transplant it. Again, fill your new planter to about an inch from the top with potting soil and make an indent in the center in which to place your cutting. To ease the roots' transition from water to soil, make sure the soil in the pot is very wet. I do this by simply pouring a bunch of water right into the indent I've made for the cutting, and immediately inserting the cutting. Then add soil to fill the hole, and water again lightly.
 Basil (transplanted from cutting) and Cat Grass (from seed)


0 comments:
Post a Comment