Showing posts with label diy. Show all posts

Tuesday, October 26, 2010

Starting your own Herb Garden Part 5: Garlic, ginger, and other easy-to-grow herbs


Missed the rest of the series? Read them here: Starting your own Herb Garden: Part 1: The Benefits of Fresh Herbs, here: Starting your own Herb Garden Part 2: Planning and Layout, here: Starting your own Herb Garden Part 3: Seed Starting and Growing from Cuttings, and here: Starting your own Herb Garden Part 4: The Indoor/Potted Herb Garden.

Did you know that some of the most widely used and most delicious herbs are the easiest to grow? In this last of installment of the Starting Your Own Herb Garden series, we'll show you how to grow your own garlic, ginger, and cilantro.

Ginger
Ginger has loads of health benefits (just do a Google search and you'll come up with tons), so much so that many people take daily ginger in capsule form. I prefer it fresh or pickled, sushi style. Fresh grated ginger is fantastically useful for cooking, especially in Asian dishes, and it makes a lovely tea. It's also ridiculously easy to grow your own.

Note: This is ornamental ginger (comes it pink or red flowers). It's pretty but not edible. The edible kind is not pretty, doesn't flower at all, and is much smaller.


To grow your own, visit your local farmers' market after the last frost. I got mine from the local grocery and it grew fine, but I was lucky--much of the commercially grown ginger is treated so that it won't reproduce. Select a rhizome (this is what most people refer to as the ginger "root," but that's actually incorrect) at least 3 inches long and with at least two well-developed growth buds--little protrusions at the tip of a "finger" of the rhizome, kind of like eyes on a potato. The more growth buds your rhizome has, the better. If the tips of the "fingers" are greenish, even better.

A ginger rhizome with 7 fingers and many growth buds. This could produce up to 10 ginger plants.


Planting Ginger
If you're unsure whether your ginger rhizome has been treated with an growth retardant, soak it in a glass of water overnight before you plant it. What's cool about ginger is that if your rhizome has more than one "finger," you can cut them apart and plant each one separately to produce several ginger plants. The only rule is that each section you plant should be at least 2 inches long and have at least one growth bud.

Growing Ginger
You can grow your ginger in a pot with potting soil, like mine, or if you live in an area that never frosts, you can plant it directly in the ground, as long as the soil is well-drained and not too clayey. Ginger takes 8 to 10 months to mature and hates the cold, which is why you should opt for potting unless you live in an almost year-round warm climate. Plant your rhizome sections 6 to 8 inches apart and 1/2 inch deep, growth buds facing up. Water regularly, but don't soak them. Ginger hates having wet feet. After a few weeks (sometimes several), you'll see the first growth. It'll look like a thin green spike.

Ginger plant spike with first leaf

6 months later


Harvesting Ginger
Ginger is ready to harvest when the leaves turn yellow and begin to wilt, 8 to 10 months after planting. I recommend harvesting in the morning so the rhizomes have ample time to dry in the sun. To harvest, loosen the soil with a garden fork and lift the whole thing gently out of the ground. Brush as much of the dirt off the remaining rhizomes as you can and lay them in the sun for the rest of the day. At this point you can cut off a few sections of the rhizome with good growth nubs to replant for next year. Break up the rest and cut off any remaining stems.

Storing Ginger
There are three options I know of for quality long-term storage of ginger:
1. Keep unpeeled in a ziplock bag in your refrigerator's crisper (up to 2 months).
2. Scrape off the skin with the edge of a spoon, cut into 1-inch chunks, and store covered in vodka or rice wine (up to 1 year). The ginger won't lose its flavor, and you can use the leftover liquid in stir-fry dishes, salad dressings, or sauces. I've yet to make a ginger vodka martini, but I'd love to try it.
3. Pickle it by peeling as above, cutting into 1-inch chunks, and storing covered in rice vinegar for 3 weeks. Remove from liquid. Use the remaining liquid as above, and store the pickled ginger in the refrigerator up to 1 year.


Cilantro
Ordinary cilantro is also easy to grow and not too picky about its soil, as long as it's fairly loose and not too wet. It prefers shade or filtered sun, will grow in pots or right in the ground, and grows quickly. Five cilantro seeds will yield you quite a bit of cilantro in a month or two. Plant the seeds 4 to 6 inches apart and 1/2 inch deep. If planting outdoors, wait until it's relatively warm out to plant your seeds. They don't like the cold.

Cilantro, one week after planting seeds. If you want instant herb gratification, this is your plant.


Garlic
Garlic is another quick sprouter, though it takes longer to mature than cilantro.

Planting Garlic
Unless you're in a year-round warm climate, the best time to plant garlic is in mid-autumn. Buy a head from your local grocery or farmers' market and keep it in the fridge until you start to see little roots sticking out the bottom. Then separate the cloves and plant them in a sunny spot, root side down, 6 inches apart, and 2 inches deep. No need to peel off the skin. The soil should be loose and well-drained.

Growing Garlic
After a few days you'll see the shoot coming up. These will die down once it gets cold. When that happens, mulch well over the whole bed. Your job is done until spring. In the spring, remove the mulch. More shoots will appear and these will continue growing into leaves that look like onion leaves but flimsier. About a month before the garlic is ready to be harvested, they'll send up something called a scape. The scape looks like a thick, hard green onion, and it's edible. It tastes just like garlic but milder and you can cut it off to eat once it's about 4 inches long. If you let them keep growing, they'll get very tall and start curling like something out of a Tim Burton movie. Once they start to curl, they'll get tough and begin losing their flavor.

Garlic, two days after planting


Garlic, 1 week after planting


Harvesting Garlic
You'll know when your garlic is ready to harvest because its leaves will start to turn brown and wilt. As with the ginger, loosen the soil and carefully pull the whole thing up. Brush off the dirt and hang the whole thing in a cool, dry place for 2 to 3 weeks. They should be dry and not smell very strongly at this point. Cut off the foliage and peel off the outer layers of skin until it looks like something you'd see at the grocery store.
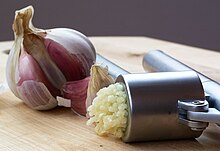


Storing Garlic
Do not seal your garlic bulbs in bags or airtight containers; this promotes molding and rotting. Garlic will keep in the fridge for 2 to 4 weeks, but the moisture level there is too high for it to keep long term. Garlic keeps longest in a cool, dry place, like in a terracotta jar or in the basement.


Growth update!
The habaneros still haven't germinated. I planted five seeds, 3 three weeks ago and 2 two weeks ago. Nada. I've heard they take as long as 2 months to germinate, so I'm not giving up yet. I'm keeping them in direct sun as much as possible to maximize warmth. Somebody I know said his didn't germinate until he started setting them on top of the clothes dryer every time he ran it.

The watermelon seedlings are growing, but not rapidly. We now have nine of them. No sign of the forget-me-nots germinating yet, but it's only been one week.

The basil and mint that I transplanted last week from the cuttings are flourishing, so I'm excited about that. I'm already dreaming of caprese salads.

Mint cutting transplant


Basil cutting transplants


Starting your own Herb Garden Part 5: Garlic, ginger, and other easy-to-grow herbsSocialTwist Tell-a-Friend

Tuesday, October 19, 2010

Starting your own Herb Garden Part 4: The Indoor/Potted Herb Garden


Missed the beginning of the series? Read them here: Starting your own Herb Garden: Part 1: The Benefits of Fresh Herbs, here: Starting your own Herb Garden Part 2: Planning and Layout, and here: Starting your own Herb Garden Part 3: Seed Starting and Growing from Cuttings

This week TAiMH will show you how to make a variety of beautiful recycled herb planters and get some ideas for creating your own unique indoor herb garden. It's time to get creative.

But first, an update on the seeds we planted last week in our totally recycled starter pots:

Yes, I confess these are watermelon seeds, not herbs. My herbs are already potted or planted. But you get the idea. It works.

8 out of 14 watermelon seeds (from farmer's market watermelon) germinated!

Also, I happened to buy a little ceramic elephant oil burner that came in this little clear plastic box. So instead of throwing away the packaging, I've recycled it into the perfect mini-greenhouse.

I planted habanero pepper seeds in these. They're notoriously hard to germinate. Cross your fingers for me.

Inside are more recycled starter pots, these ones made from styrofoam coffee cups. Starbucks espresso cups work well too, by the way. However, I certainly don't recommend buying disposable cups if you can bring your own travel mug for them to fill. MDT just happened to buy us surprise snacks at the fair last week, which came in these.

Recycled mini-greenhouse


Now that your little seeds have germinated, the next step is to pot them. Here are some ideas for creative recycled planters

Hack #1: Turn vegetable cans/tins into a matching set of planters for your indoor herb garden.

Materials
  • vegetable cans/tins (remember to poke holes in the bottom for drainage)
  • ribbon, buttons, bottle caps, bows, or any other little decorative, waterproof things you've got lying around
  • a hot glue gun (or at least some super glue)
  • Scotch tape
  • Sharpies

Possibilities:

I've been dying to do one covered in multicolored buttons, but I haven't collected enough yet.


Need more inspiration? How about these great recycled planters:

culantro (related to cilantro) in a broken concrete block

2 liter bottle herb garden from GreenScaper

Coffee can hanging planter, tutorial on Beach Petals

recycled windowsill herb garden, from Apartment Therapy


If you haven't got any suitable materials to recycle into planters, why not buy some cheap ceramic pots and paint/decorate them yourself? Fresh paint is also a great way to recycle an ugly old pot into a pretty one that matches your kitchen. ;)

Plain ceramic pot $1, painted with acrylics


Ready to transplant?

Transplanting Seedlings
When your herb seedlings are about 3-4 inches tall, they're ready to transplant into your new lovely planters. Fill your new planter to about an inch from the top with potting soil and make an indent in the center in which to place your seedling. Peel off the masking tape from around the starter pot, carefully remove the paper bottom, and place your seedling, paper towel roll and all into your new planter. Water lightly.

Transplanting cuttings
When your cutting has roots at least 4 inches long, you're ready to transplant it. Again, fill your new planter to about an inch from the top with potting soil and make an indent in the center in which to place your cutting. To ease the roots' transition from water to soil, make sure the soil in the pot is very wet. I do this by simply pouring a bunch of water right into the indent I've made for the cutting, and immediately inserting the cutting. Then add soil to fill the hole, and water again lightly.

Basil (transplanted from cutting) and Cat Grass (from seed)

More basil cut from the same parent plant and transplanted


Next week, join us for our final Starting Your Own Herb Garden installment where we'll show you how to grow garlic, ginger, and other herbs you can plant straight in the ground.


Starting your own Herb Garden Part 4: The Indoor/Potted Herb GardenSocialTwist Tell-a-Friend

Monday, October 11, 2010

Starting your own Herb Garden Part 3: Seed Starting and Growing from Cuttings


Missed Parts 1 & 2? Read them here: Starting your own Herb Garden: Part 1 and here: Starting your own Herb Garden Part 2: Planning and Layout


This week we'll learn how to start your seeds indoors for later planting outside, and how to start a new plant from a cutting.

Indoor Seed Starting
Hack #1: Make your own "peat" pots for free
The point of starting your seeds in peat pots rather than in plastic containers is that you can put them straight in the ground, pot and all, and not have to worry about ripping roots. But you don't have to go out and buy these guys, you can make them yourself with household items.

Materials
For the pots:
  • a newspaper (B&W pages only)
OR
  • several toilet paper/paper towel rolls
  • scrap paper
  • masking tape or string

For the tray
  • a plastic grocery bag
  • duct or masking tape
  • a cardboard box


Directions
If you're using paper towel or toilet paper rolls:
  1. For toilet paper rolls, cut in half. For paper towel rolls, cut in four.
  2. Wrap a piece of masking tape around the middle of each roll. This is so that after a few days of watering, the rolls don't start to come apart and unravel (like they are in my picture).
  3. Cut your scrap paper into roughly 4" x 4" squares.
  4. Stuff a square of paper into each roll and shape it to form the bottom of the pot.

If you're using newspaper:
  1. Find a cup, jar, or can with roughly the circumference you want for your pots (about as big around as a toilet paper roll).
  2. Take a sheet of newspaper and wrap in around the jar several times. Then fold the remaining length on the bottom to cover the bottom of the cup/jar/can.
  3. To make the bottom stay put, wet it just a little. I use my ironing spray bottle. Then smash it down hard.
  4. Slide your new pot off the jar/can/cup and fold the remaining length on the top down inside the pot to strengthen the walls. Spray with a bit of water if necessary.
  5. Let dry.
  6. Repeat process for each pot.
toilet paper starter pots with paper bottoms and potting soil

For a tray to put them in:
  1. Cut down the sides of your cardboard box to about the height of the pots.
  2. Cut your plastic grocery bag down the sides, and cut off the handles. Use it to line the inside of the box. Tape in place.
  3. If you're going to plant more than one type of seed in the tray or you're making more than one tray, you might want to label the outside of the tray/box with a marker, so you don't forget what you've planted where.


Planting Your Seeds
Hack #2: Instant Greenhouse

Materials
  • Starter pots and trays
  • potting soil OR regular soil plus liquid fertilizer (e.g., Miracle Gro)
  • plastic wrap or other clear plastic

Directions
Now that you've got your starter pots ready, it's time to plant.
  1. First, fill your pots with soil. If you're using regular soil, spray each filled pots generously with the liquid fertilizer and then wait until tomorrow to plant your seeds.
  2. Check your seeds packs for any special instructions, such as soaking the seeds in water. Then, using a chopstick or a pencil (eraser end), poke a hole about an inch deep in each pot (or less, depending on the type of seed) and drop in a seed.
  3. Spray the seed with water and gently push the soil back over it. Do not press down. The soil should be loose, not packed.
  4. Cut the clear plastic to fit and lay it over the pots.
  5. Set the tray in a sunny window, under a lamp with an incandescent light bulb, or in some other warm location.
Messily taped but fully functional seed tray with starter pots and "greenhouse" (AKA clear plastic)

Keep your seeds warm and moist and they'll germinate in no time. Once germinated, they'll need sun as well as warmth, so clear some windowsill room. Leave the plastic on top only until the seedling get about an inch high.


Starting a New Plant from a Cutting
Materials
  • old soda or water bottle with a narrow mouth, clear plastic is best so you can see the roots growing
  • a plant that propagates from cuttings
  • liquid plant food (e.g., Miracle Gro) optional

Directions
  1. Choose a stem with at least four leaves and cut it off on the diagonal, preferably just above a lower set of leaves. The cutting should be at least four inches long.
  2. Fill your old bottle with water and gently set the cutting in it. Pour out excess water until only the bottom 2-3 inches of the stem is immersed.
  3. Change the water every few days, adding a tiny bit of liquid plant food if desired.

Several mint cuttings, after about 2 weeks in water


Next week, Planting in Pots and Outdoors: Learn how to make a variety of beautiful recycled herb pots and planters and get some ideas for creating your own unique herb garden. It's time to get creative.


Starting your own Herb Garden Part 3: Seed Starting and Growing from CuttingsSocialTwist Tell-a-Friend

Monday, August 16, 2010

Make a Cat Scratching Post for FREE


So, yesterday I made a scratching block for my cats, in under 20 minutes, just like the ones I've seen at pet stores for up to $25 (see below). For absolutely free. And it's double-sided!


Materials
:
  • corrugated cardboard (from shipping inserts, old cardboard boxes, etc.) If you don't have any around, ask at your local corner store or grocery store if they have any extras lying around. That's what I did.
  • duct tape
  • scissors or a box cutter
  • ruler
  • pen or pencil
  • glue (regular school glue works just fine)


Directions

  1. Take apart your box so you are left with flat pieces of cardboard.
  2. With your ruler and pencil, measure and mark 2" strips, the desired length of the scratcher. (Mine is roughly 18" long because that's how long my boxes were once I disassembled and flattened them.)
  3. Cut out the strips. Don't worry about creases. They don't matter.
  4. Keep cutting out strips until you have enough, when stacked on top of one another and smashed together, to make the desired width of your scratcher. Mine ended up being about 6" wide. Next time I might make it a bit wider.
  5. Once all your strips are cut, it's time to glue them together. Put a generous line of Elmer's on your first strip, lay another on top and repeat for the rest of the strips, making sure they're lined up evenly and working quickly so your glue doesn't dry yet.
  6. Duct tape each end together to hold them in place and then place a couple of bricks or something else heavy on top of the whole thing to compress it and help the glue set.
  7. Wait 10-15 minutes, remove the bricks, duct tape 2 layers around the whole thing to secure it, and you're done.

Tips:
  • As a treat, sprinkle some catnip on the scratcher every once in a while.
  • I find my cats like the scratcher best either on carpet or a rug; otherwise it can slide while they're scratching--unless they're sitting on top of it like Ed likes to do.


Make a Cat Scratching Post for FREESocialTwist Tell-a-Friend

Monday, May 24, 2010

Frugal Home Decor: Add seating and color to your patio with a DIY recycled patio bench


We have pretty magnificent sunsets here. And there's nothing like relaxing on the porch and having a couple drinks in the evening. All we used to have for seating, though, were a couple of ugly plastic chairs, and those finally cracked and broke. So I set about gathering materials to build some deck furniture. I'm no expert carpenter, mind you, so I kept it simple for my first project: a wooden bench (cushions to come as soon as I can get by the fabric store). This is about the most simple bench you can build and it requires very few tools. It's a super quick, super easy, and super cheap, afternoon or weekend project.

All the materials used to build this bench were recycled, except the paint, and we got that on sale because it was already mixed. Even if you had to buy the wood, too, you'd spend less than $15.


Supplies:

4 2x4s, the desired length of your bench (we got these from a neighbor who had them left over)
hammer and nails
a hand saw or circular saw
1/2 quart of indoor/outdoor wood paint (if you have some leftover from another project, all the better)
a paintbrush
concrete cinderblocks or other support (leveled tree stumps, upside-down metal buckets, etc.)


Directions:
  1. Take one of your 2x4s and cut from it 2 11" lengths. These are the pieces that will hold the your bench seat together. Scrap the rest of that plank and keep it for another project.

  2. Using an electric sander (unless you want really sore hands and arms), sand one side of the 3 long 2x4s until very smooth. Don't forget the edges and corners.

  3. Prop all 3 planks, smooth side down, atop your supports (or two sawhorses, etc.) and align them carefully. Place the two shorter pieces across them at either side, 5-6 inches from the edges, and mark around them with a pencil. If you have C clamps, you can skip the pencil marking and just clamp them together.

  4. Flip everything over, realign, and place one nail in the center of each long plank, aligned with the center of the short support pieces. (See image below.)


  5. Flip everything back over and hammer the sharp ends of the nails sideways so that they're flat against the wood.

  6. Paint! Follow the directions on the can as to how long to wait between coats; you'll probably want at least 2.
Et voila! Your new patio bench.


Tip: Use leftover paint to color other accent pieces on the porch or around the yard for a unified look. I used mine on some upcycled flower pots.


Frugal Home Decor: Add seating and color to your patio with a DIY recycled patio benchSocialTwist Tell-a-Friend

Monday, December 21, 2009

Give Homemade, Wrap Homemade: How to create your own festive and frugal wrapping paper, gift bags, and gift boxes.


Since we've dedicated the last several posts to homemade and frugal gifts, it's only fitting that we now share homemade and frugal ways to wrap those gifts. There's no use worrying about saving money on gifts and then spending the money you saved just to wrap them, right? So here are some ideas for cheap, cute, thoughtful giftwrap.

Make your own wrapping paper
Turn paper grocery bags into functional works of art. Use them plain and dress them with pretty ribbon or colored twine or get creative and decorate the paper with paint, crayons, or colored pencils.

If you're making paper for more than one gift, chances are you'll want to mass-produce to save time. This is where the stamps come in. Use rubber stamps and ink, X-mas cookie cutters with paint or make your designs by carving some potato stamps. If you've got kids, give them some finger paint or crayons and let them go to town. This is a great opportunity to involve them in the giving process.

If you don't have paper grocery bags lying around, art and school supply stores offer economically priced brown or white butcher paper on large rolls. No paint around? Dying with coffee or tea can give some surprisingly classy-looking results. I especially like the vintage-y combo of coffee or tea-dyed newspaper.


Alternate Wrappings
Don't have the time to make your own wrapping paper? Or perhaps you're not feeling very artistic? No problem. Try wrapping gifts with other spare items such as:
  • scrap fabric

    Traditional Japanese wrapping cloth,furoshiki,...Image via Wikipedia

  • maps (if you don't have a bunch of old ones lying around like I do, you can pick them up from your local tourist information office for free)
  • old newspapers or comics
  • children's artwork
  • magazine pages—choose festive spreads or be clever and pick pages that hint at the recipient's interests or even the gift itself


Boxes, Bags, and More

Need something to protect your gift before you wrap it? Try one of these before you pay for a gift bag. (If you must buy gift bags, hit up the dollar store first; they usually offer them for 1/4 what regular stores charge.)
  • shoeboxes
  • coffee cans
  • oatmeal canisters
  • baskets
  • glass jars
  • check out this tutorial about how to turn a cereal box inside out for a frugal, eco-friendly gift box


Tags
Hole punch, add ribbon, et voila!
  • scrap cardboard from food boxes
  • scraps leftover from grocery bags or wrapping paper
  • cards from old board games
  • playing cards
  • last year's Christmas cards


Bows/Gift-toppers
  • old hair ribbons, bandannas, or scarves
  • scrap fabric or ribbon
  • Christmas ornament (homemade or otherwise)
  • for children: spare GI Joes, Polly Pockets, or other small toys
  • a sprig of holly or spruce
  • tissue paper (or plastic grocery bag) pom-poms
  • candy canes or other festive-colored candies
  • a few loops of cranberry garland
  • small glittered pine cones
  • paper grocery bag handles (these can be quite easily glued into cute bows)


Give Homemade, Wrap Homemade: How to create your own festive and frugal wrapping paper, gift bags, and gift boxes.SocialTwist Tell-a-Friend

Monday, December 14, 2009

Quick Hack: Easy Recycled Materials Christmas Candle Holder


Make a pretty, festive, tapered candle holder for absolutely free with items you have sitting around the house.


Materials
4 toothpicks
glue
1 candle
2 rubberbands
pocket knife or craft knife
wide ribbon or scrap of fabric
any plastic container with a spout that roughly fits your candle (I used a small bleach bottle.)


Directions
  1. Cut your container about 2 inches from the top.

  2. Cut it again about 3 inches from the bottom.

  3. Discard the middle piece.

  4. Invert the top piece and insert it into the bottom piece. Glue to secure them together. This is your holder.

  5. With your knife, cut small notches into the middle of your toothpicks. This isn't essential, but it helps the glue hold them together better. Two of the toothpicks will need one notch on each side; two of them (the top and bottom toothpicks) will only need one notch each.

  6. Stack your toothpicks in a star formation and glue, preferably with either superglue or a hot glue gun.


  7. While the star is drying, wrap your ribbon or scrap fabric around the holder and glue in place. Use the rubber bands to hold the ribbon or fabric in place while the glue dries.

  8. If desired, paint or otherwise decorate the star. Gold glitter looks especially nice in candlelight, I think.

  9. Once both the holder and the star are dry, glue the star onto the ribbon/fabric. Balance between the candle and the toothpick container until it dries, et voila!


Quick Hack: Easy Recycled Materials Christmas Candle HolderSocialTwist Tell-a-Friend

33 Easy and Frugal Homemade Holiday Gift and Decoration Ideas


a red blown glass Christmas tree ornament, a t...Image via Wikipedia

With the unemployment rate at a record high and the economy doing so poorly, many of us have resigned ourselves to giving and receiving less this holiday season. But that doesn't have to be the case. Homemade gifts are more thoughtful and personal, as well as more frugal. There's no reason being on a budget has to mean toning down the fun and festivity of the giving season.

Making homemade gifts for kids can be more challenging. They've likely had a list of expensive toys or video games ready for the past month. If this is the case, choose one or two of the less expensive items on their list and combine it with one or more homemade gifts from the "Especially For Kids" section below. This way they get just as many presents as they're used to, but you spend less money. Plus, it's a great way to introduce children to being creatively frugal and ushering them away from consumer comercialism.

The key to creating fantastic, frugal, homemade gifts is to know your strengths. What do you do well? Cook? Bake? Sew? Build? Knit or crochet? Draw? The following are a set of lists of inexpensive, easy-to-make homemade gifts your friends and family are sure to adore, organized by talent. I haven't seen this type of organization before; I hope it's helpful.

Cooking
  1. Homemade preserves, jams, and spreads. Make a variety, put them in cute jars with printed or handwritten labels, and arrange the jars in a basket. You can often find small inexpensive baskets at garage sales, craft stores, or home and garden stores.


  2. Homemade sauces, condiments, and marinades. Package as in #1.

  3. Homemade cookbook or recipe cards. Know someone that loves your cooking? Compile recipes of their favorite dishes (or ones you think they might like). Print them on paper and arrange in a decorated binder or write them by hand on homemade recipe cards. If you're not strong in the art department, you can usually find cute sets of inexpensive blank recipe cards at Marshall's. If you can find or decorate a cute box for the cards, even better.

Baking
  1. Loaf of special homemade bread. Make it a regular white loaf, or if your loved one is more health conscious, try a whole wheat or mixed whole grain loaf. Tip: Spice it up: make a flavored and herbs like rosemary, dill, tomato-basil, or sourdough or make it look fancy by braiding it.

    If fresh bread won't work for travel or other reasons, try making bread mixes instead. Put each in a small paper bag and label nicely. Include handwritten recipe cards with instructions. Collect bags in a basket or larger gift bag.

  2. Two words: gingerbread men (and/or women, snowmen, wreaths, etc.) These are super fun to make and decorate and they're a great project to do with kids. Make them to eat or to use as ornaments.


  3. Assorted homemade cookies. This is good if you have multiple people to "buy" for. Make one or more batches (depending on how many people your giving to) of several types of cookies and package in small baggies tied with festive ribbon. In a nice basket or other container, one for each gift recipient, put one baggie of each type of cookie. If you're in a pinch, even personalized brown lunch bags can be prettied up. As in #1, if the gifts have to travel a ways or for other reasons keep for a long time, consider making mixes instead.

  4. Homemade pancake, waffle, muffin, or biscuit mix. Package as above. A small wooden scoop is a nice touch. You can find these at craft stores. Package the mix in small brown bags or mason jars tied with a ribbon and hand-labeled.

  5. My all-time favorite baked gift: cherry pie. Do not underestimate the giving power of a homemade pie. Cake, flan, or other delicious desserts are also welcome. (Hint, hint.)

Sewing/Knitting/Crocheting
  1. Handmade tool belt, tote, makeup bag, purse, pencil organizer, or messenger bag.


  2. Ready-to-hang embroidered or needlepoint work in frame.

  3. Embroidered/personalized handkerchiefs, scarf, pillows, or sachets.

  4. (Relatively) quick knitted/crocheted items such as scarves, gloves/mittens/glittens, cozy winter hats, socks, woven belts, etc.

Building/Crafting
  1. Picture in handmade frame: Make your own from wood, or if you're less skilled with carpentry, try making simple ones from rigid cardstock and decorating them with felt, marker, paint, fabric, and/or glitter.

  2. Handmade Christmas ornaments. Ideas: dyed popcorn and/or cranberry strands, oranges with cloves, gingerbread ornaments, sparkly pine cones, photo ornaments, paper snowflakes, felt cutouts, etc.

  3. Try this fabulously simple salt-dough recipe to make paintable ornaments: Combine 1 cup flour, 1/2 cup salt, and 1/2 cup water. Roll out dough and cut either by hand or with cookie cutters. Bake at 250F for 2 hours.


  4. Colored, scented, and/or decorated candles. Go a step further and make candle holders, too!

  5. Bowls, planters, vases, or ashtrays made from old vinyl records—bad ones can usually be found for around 50 cents each at thrift stores.

Drawing/Painting/Design
  1. Coffee mug with treats: Find some plain mugs at a thrift store or garage sale, get some ceramic paint, and create a personalized, useful coffee mug. Stuff it with a baggie of whole coffee beans or candies, and tie with a ribbon.


  2. Decorated plant pot with seeds or small plant and care instruction card.

  3. Thoughtfully designed, personalized stationery, note cards, postcards, or phone/address book. Make them on the computer or by hand the old fashioned way with rubber stamps, colorful paper, and glue. Warning: rubber stamps and decorative papers don't come cheap. Attempt this only if you already have these items.

No talent required
  1. A pound of pistachios, nice teas, or coffees, packaged nicely by hand.

  2. Homemade cocoa mix: recipes here. Package in a decorated mason jar or paper lunch bag.

  3. Gourmet, homemade teas: Recipes here. If you can find a cute inexpensive teacup or pot, arrange your homemade teas inside it and add a pretty ribbon.

  4. Homemade organic body scrubs, lotions, oils, bath salts, or bath bombs. Recipes here.

Especially For Kids
  1. Homemade play dough: make a variety of colors and place in assorted tubs or other plastic containers. Label and package in a dressed up box or basket, preferably one that they can use permanently to store their new play dough.

  2. Handmade stuffed animals.

  3. Lacing cards made from old greeting cards or magazine pictures glued (glue stick works best) to cardstock.

  4. Homemade crayons. Collect broken or super short crayons, melt them down, and create beautiful swirled crayons in fun shapes.


  5. See "cookies" under "Baking" above. Duh.

  6. Painting Set. Combine some paint brushes, assorted paints (corresponding to the child's age and ability), paper, and perhaps a palette. For the palette, try an old cutting board or plastic lid with a child size thumb hole cut out. Or if that's out of your crafting league, check your local art supply store, dollar store, or toy store for inexpensive ones.

  7. Drawing Set. Combine assorted weight pencils, charcoal, and erasers with an inexpensive drawing pad and perhaps a tracing pad. Depending on the child's age and ability, you could throw in some drawing books as well. You can often find these in the "bargain" section at bookstores.

  8. Gardening Kit. Combine and package a few different types of seeds and/or bulbs, toy gardening tools (sand castle kits from the dollar store work well and are cheap), a labeling kit (popsicle sticks and cardstock rectangles), and perhaps a toy watering can.

  9. Costume Chest. In a large box, decorated perhaps with the child's name, combine various articles or clothing that would be fun for playing dress-up. Raid your closet for items that either don't fit or are out of style and make a trip to Goodwill to make up the rest. The more outrageous the better.


33 Easy and Frugal Homemade Holiday Gift and Decoration IdeasSocialTwist Tell-a-Friend

Got Design?

TAiMH blog design by Belle Étoile Studios.